Plumbing and Mechanical
The WCS Plan Set is essential to every project. It lists all necessary plumbing and mechanical materials, component specifications, electrical specifications and spacial requirements. Reference this document regularly.


The WCS Plan Set is essential to every project. It lists all necessary plumbing and mechanical materials, component specifications, electrical specifications and spacial requirements. Reference this document regularly.
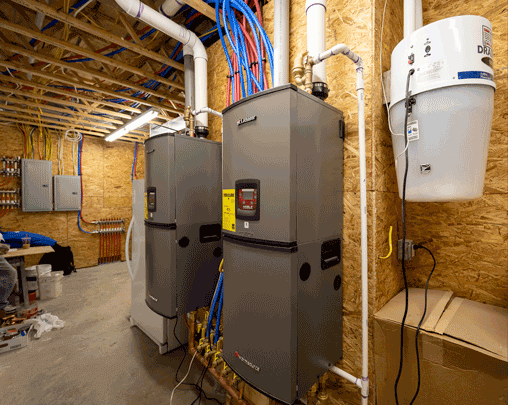
The following components are pre-plumbed inside Warmsource:
The following is a partial list of items included with the install kit, but not pre-plumbed. Refer to the WCS Plan Set for pipe sizing, layout, and the extended bill of materials:
The WCS controls equipment needs access to power at all equipment locations across the project.
Each piece of equipment will likely require its own junction box. Often manifolds may share a single install location and are permitted to share duplex receptacles.
The controls diagram in the WCS Plan Set illustrates how each piece of equipment should be powered.
The Wireless Controls Diagram in the WCS Plan Set contains the electrical specifications of the controls equipment:
Thermostats may be cut in above light switches and manifold controllers may be added onto existing circuits. However, it is almost always a better practice to put the thermostats and manifold controllers onto a specific circuit. Refer to the Equipment and Piping Layout in the WCS Plan Set for specified equipment location.
Like all gas-fired boilers, a Warmsource makes some noise and may be disruptive if installed near a bedroom or common living space. Garages and basements are the better choice. Install the unit in the location shown on the Equipment and Piping Layout in the WCS Plan Set. If this location needs to change, speak to your Project Manager before making those changes.
The recommended minimum dimensions for the Warmsource mechanical area are below. Also shown, is the space necessary for piping and mechanical components. To ensure easy access, a 30″ x 30″ clearance in front of the unit is recommended.
The boiler is equipped and adjusted to burn natural gas. For WCS projects specified for liquid propane, a conversion kit is included in your shipment, but it has not been installed.
This kit must be installed prior to commissioning the boiler. Directions for converting the boiler to liquid propane can be found in the Lochinvar installation manual (Chapter 2: Prepare Boiler). Completing this conversion before hanging the boiler will allow for ease of install.


Tips:
Choose your Warmsource setup:
Go back to WCS install guide.