Custom Routing instructions

Selecting a Router

Provided Equipment in Warmboard installation kit

The items shown below are shipped with your installation kit and should be used when routing. DO NOT attempt a route without them.

install kit router

correct sub-base with the supplied metal template guides installed

  • Not all sub-bases interface properly with the supplied items.
  • DO NOT attempt a route without the correct template guide.
  • Consider the Makita RF1101 router which is a readily available and a cost-effective solution.

Custom Routing procedure

Procedure

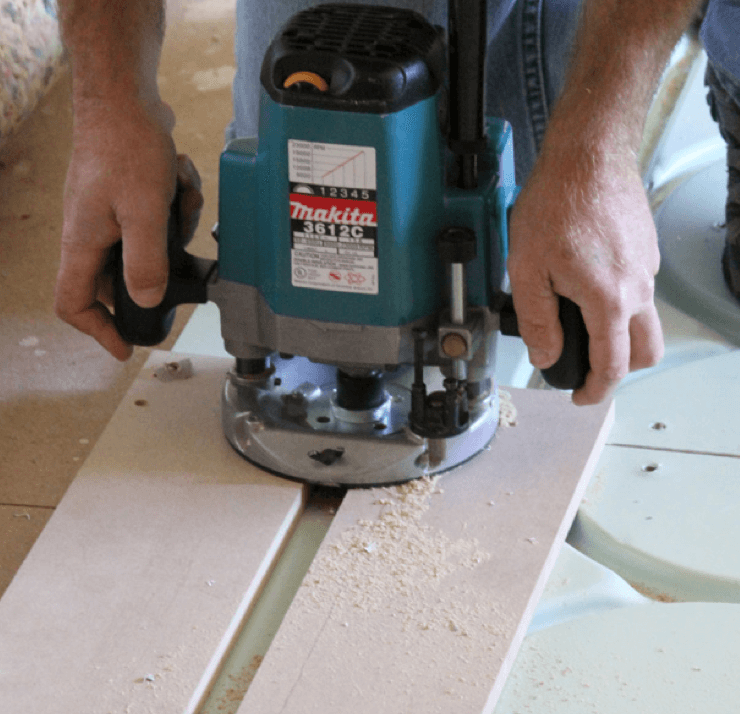
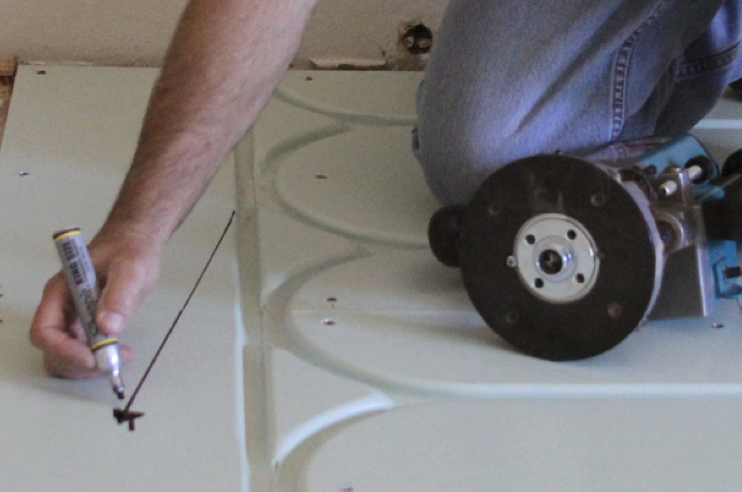
Using the provided 5/8″ core box router bit, grooves can be routed directly into Warmboard panels. Templates for common curves can be found in the installation kits as well as a template guide for a router. Making templates on the job site for longer custom routes may be preferred.

  1. Place the router template over the desired area and fasten into position with 3 screws. Be sure the screws do not interfere with the path of the router.
  2. Confirm that the router bit depth is set correctly. The tip of the bit should barely bite into the surface of the aluminum. 
  3. Proceed with the route.
  4. Ensure the groove is smooth and consistent. If complete, remove the template guide.
  5. Use a 4″ grinder or deburring tool to smooth the aluminum edges for the tubing installation.
  6. Use a shop vac to clear debris from the channel.
  7. Place a piece of tubing into the new groove to confirm it sits level and flush with the Warmboard panel.

Check List

  • Review all the tubing layout plans
  • Use a permanent marker and the provided wood templates to mark all areas on the Warmboard panel that will require custom routing
  • Prepare router with router bit, template guide and template guide lock nut

The router base needs room to operate and may be difficult to use near a wall – plan accordingly.

Prolong the life of your router and bits by balancing the proper speed (RPM) with feed rate (rate of cut). A router that bogs down will cut poorly and burn out sooner. Cutting slowly with a high speed will burn out bits.