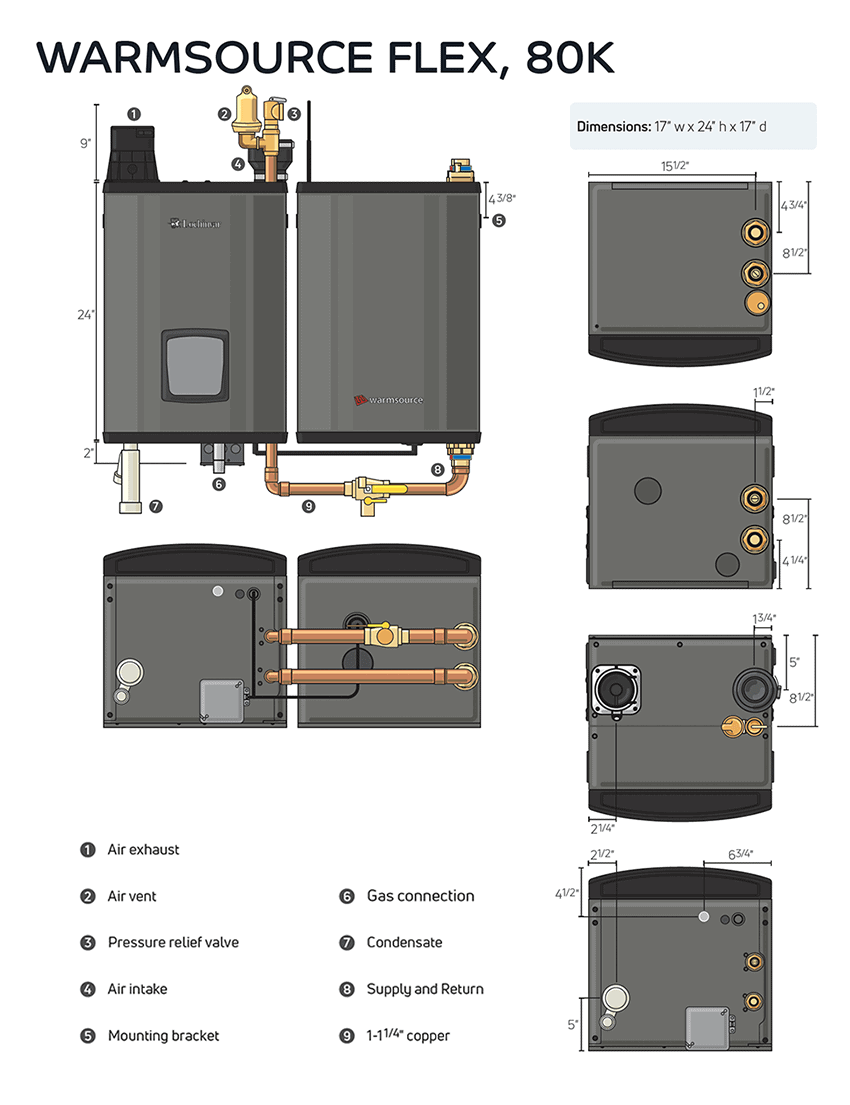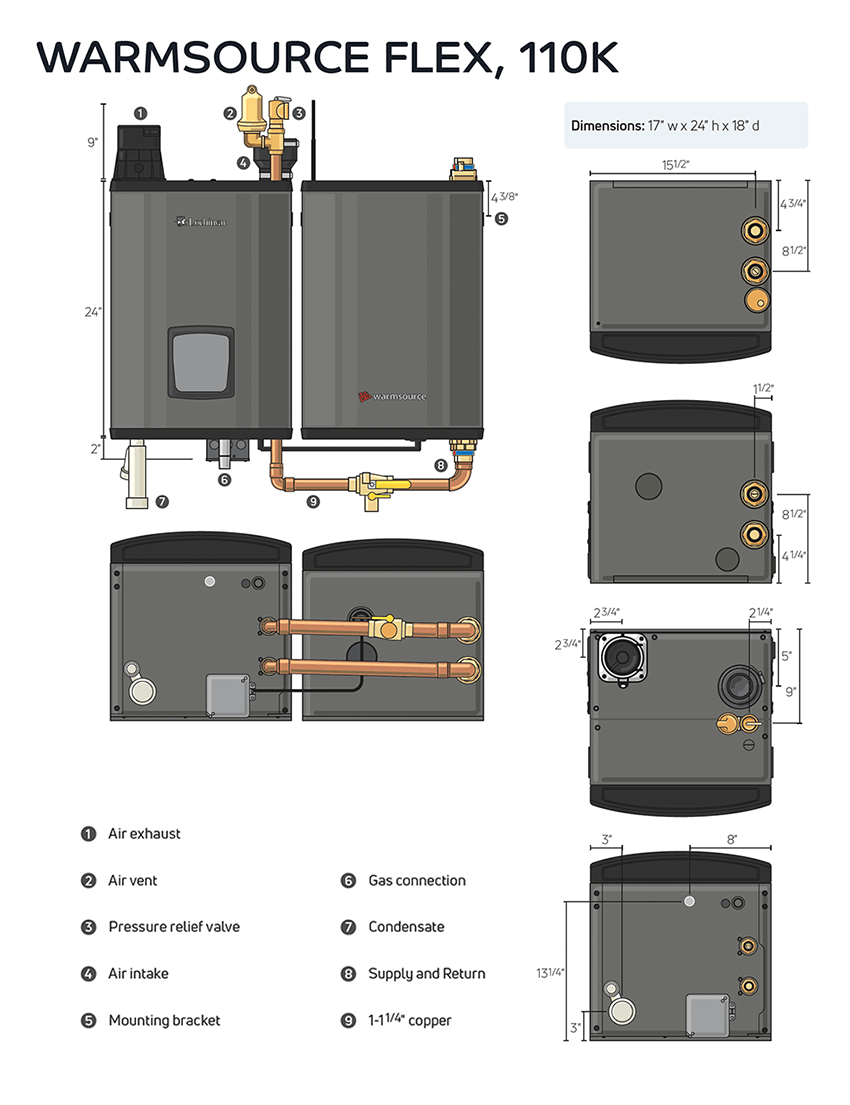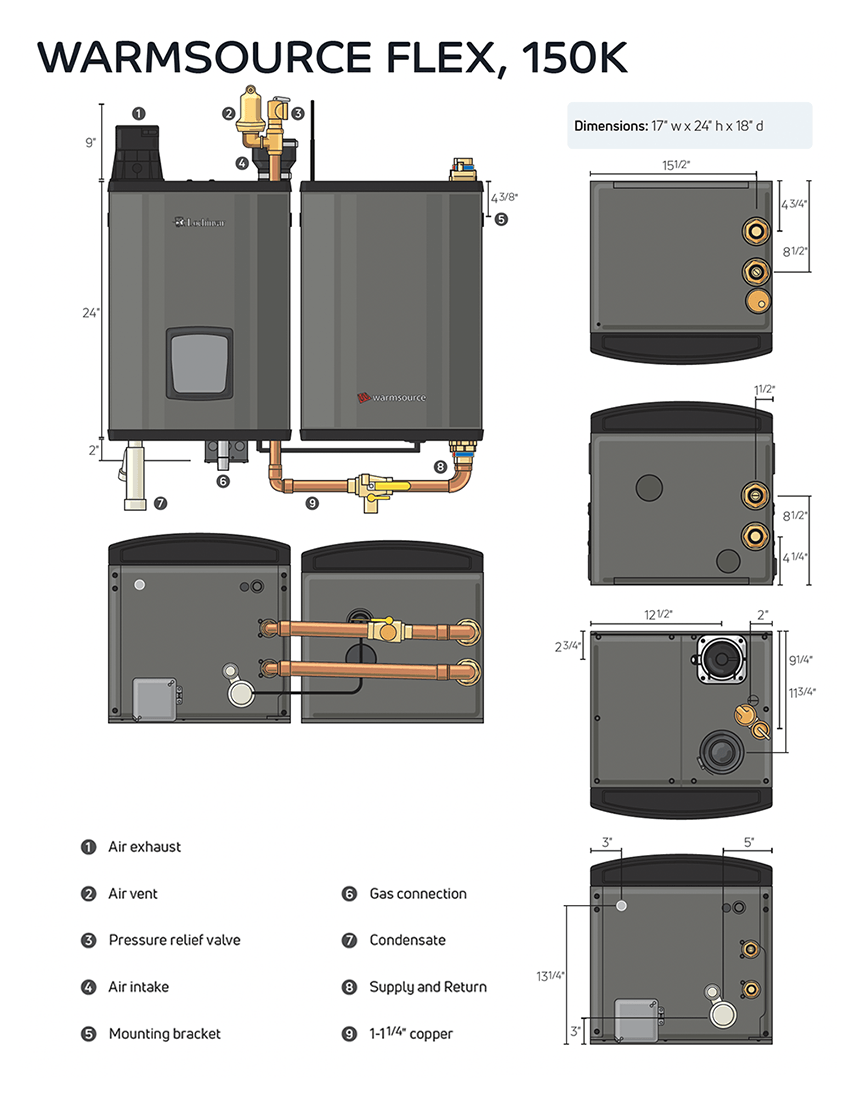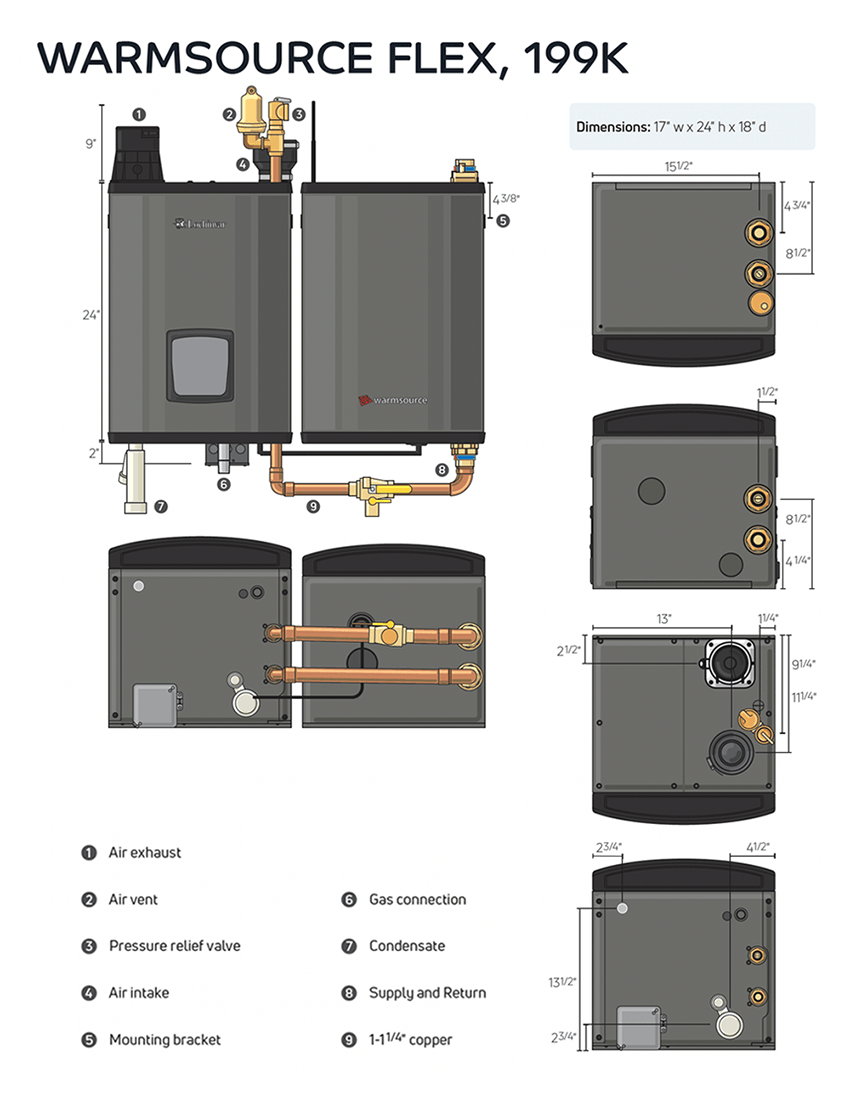
Warmsource Flex Installation

Warmsource Flex Addendum

The Lochinvar and the Warmsource Flex unit use the same mounting system and connection instructions described on the Warmsource install guide.


Mounting Warmsource Flex

Fasten the mounting bracket to the wall. The use of blocking before drywall or ledgers after drywall may be necessary to securely mount the bracket.

Lift the Warmsource Flex onto the bracket using the integrated handles. Anchor the unit by fastening through the bottom mounting flange to the wall.
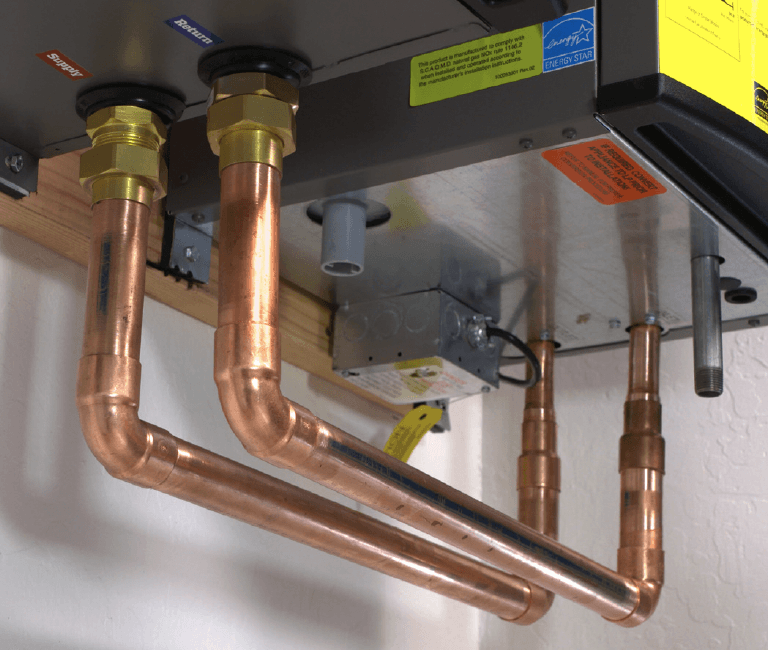
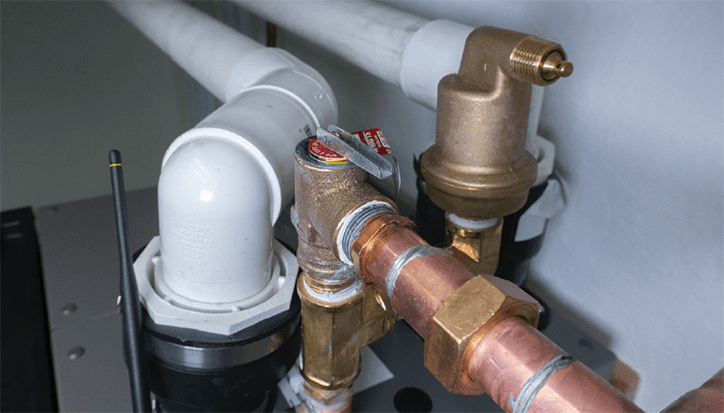
  • The Warmsource Flex unit requires a primary supply and return line to be plumbed between the two units. Reference the mechanical diagram in the WCS Plan Set for more details.
  • Per the mechanical diagram in the WCS Plan Set, the secondary supply and return lines for the Warmsource Flex come out of top of the unit.

Connections

Lochinvar Boiler 

  • Connect the air intake and exhaust, gas line, condensation drain line, and pressure relief drain line per the Lochinvar Manual and local code.

System Piping

  • Build the distribution header according to the mechanical diagram in the WCS Plan Set.
  • Connect all supply and return lines at the manifold.
  • Plumb the system water feed from the domestic water on the job site per the mechanical diagram in the WCS Plan Set
  • Warmsource is very heavy and will require two people to lift and carry.
  • Condensate neutralizers may be necessary in your jurisdiction. Failure to install neutralizers properly can cause the condensate drain to back-up

Warmsource Flex Specifications