Engineered, Laminate And Bamboo applications

Engineered Hardwood flooring install guide

This step of the radiant heat panel install goes after the preparation and installation of the panels. We recommend to review the complete install guide and our supplied plan set before work begins.

Engineered Flooring

Numerous engineered flooring products have been developed in recent years. With each product comes variations in material, assembly method, dimensional stability and overall quality.

Warmboard is unable to test every iteration of these products and therefore cannot express an informed opinion on how variations in humidity may impact their dimensional stability. We leave it to the consumer to do their own due diligence to determine any particular engineered product’s suitability for their project. 

About Moisture in wood flooring

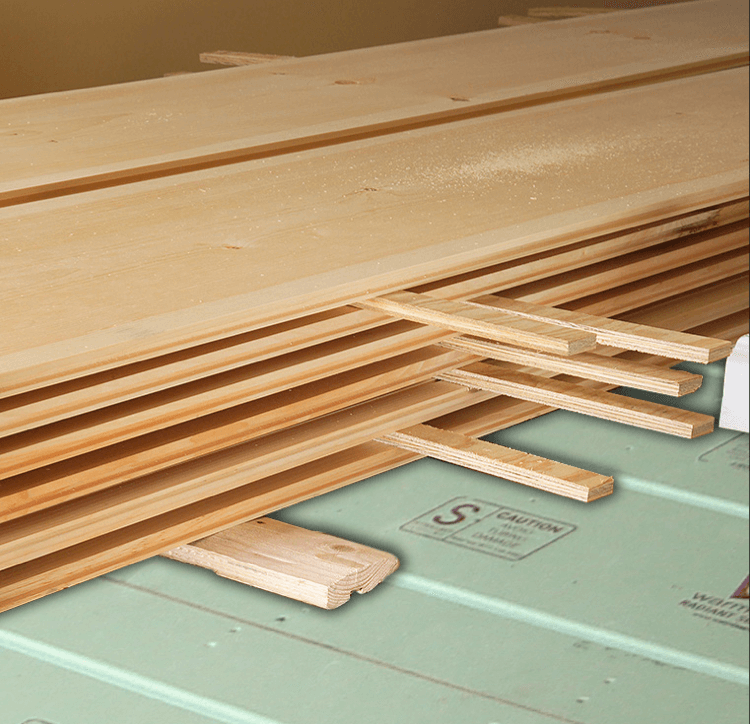
All wood products expand and contract with changes in humidity. When these dimensional changes do occur, cupping, crowning and gapping at the edges may result. These changes are inherent to all wood flooring, regardless of the heating method. To minimize such dimensional changes, especially as humidity varies throughout the seasons, we also recommend quartersawn and/or rift cut planks due to their stability.

To further limit dimensional movement, ensure the hardwood has the proper moisture content at the time of installation. A good hardwood installer will know the ideal range for your geographic region (moisture content should be at the low end of this range). A moisture meter is required to determine when that moisture percentage is achieved.

A Word about Flooring Thickness

Many mistakenly believe that a radiant floor cannot have 3/4″ thick floor coverings. This thinking is based on a theory that the resulting higher R-value prevents the system from adequately heating the space. This may be true for low conductivity radiant panels, but not Warmboard. Apart from the fact that thicker hardwood, all things being equal, is better quality, its increased R-value causes more even heat across
your floor with the result that your feet will not be able to tell where tubing is and isn’t. With thinner material, the temperature variation across the tubing is increased causing what is known in the radiant industry as “striping” which makes your floor less comfortable. And comfort is the primary reason for Warmboard’s existence, which is why we recommend using 3/4″ hardwood over our panels.

  • Whether using plank, engineered or laminate wood flooring, there have been thousands of successful installations over Warmboard.

Engineered Hardwood Acclimation

Before the hardwood is on site, ensure the interior plastering is complete (and dry), and that the radiant system has been operating for a couple weeks in order to reduce any excess moisture from the Warmboard panels. In some locales, you may need to operate the air conditioner simultaneously with Warmboard to lower the indoor humidity. The hardwood should experience consistent, low humidity once on site.

Consider any moisture or humidity intrusion that may take place in the future, such as a crawl space beneath the Warmboard panels which could be dry in the summer and experience water intrusion in the winter. This could cause large humidity swings and excess movement of the hardwood flooring.

Once the interior space is properly conditioned to the desired relative humidity, bring in the engineered wood planks and sticker them – pulling the planks out of their boxes and setting them up so air can circulate around them.

Prior to flooring installation, the moisture content of Warmboard-R should be 12% or less. The moisture content of the finish hardwood should be between 6-9%, though this will vary by climate zone. Be sure to discuss this with your flooring installer.

It will be difficult to get a moisture reading from Warmboard due to its aluminum surface, so we a moisture meter with insulated contact pins and hammer probe. The Delmhorst J4 and J2000 models (delmhorst.com) are good options, and can be upgraded with pins and hammer probe.

Acclimation recommendations

  • It is ESSENTIAL to acclimate wood flooring prior to installation. Acclimation time can vary by season, but two weeks is recommended.
  • Keep low moisture levels in the hardwood to  ensure long term stability. Maintain an indoor ambient temperature between 60-80˚F (15-26˚C), and keep the humidity between 30-50%.

Operating the System

Circulate warm water under the newly installed floor for a few days before gradually bringing the water temperature up to the designed set point. For example, start with 100ºF, then increase to 120ºF. Finalize the set point according to the needs of the structure.

Ideally, the heating system should use “Indoor Reset” or another type of reset control strategy. “Reset” is a system for automatically resetting boiler temperatures (up or down), to better meet changing heat loads. This is an excellent strategy for hardwood floors.

Engineered, Laminate and Bamboo installation

Engineered hardwood installation recommendations

  • It is essential to lower the moisture content of your hardwood prior to installation.
  • Warmboard’s aluminum surface acts as a vapor barrier – no additional vapor retarder is required.
  • Wood flooring can be installed directly over the Warmboard panels.
  • If considering bamboo, visit plyboo.com. They offer a full warranty with Warmboard.

Approved Adhesives

  • Bona R850T, R851, R859
  • Bostik’s BEST, BST, Climb, EFA+, GreenForce, HDAC, ProCure, Pro-MSP, Ultra-Set SingleStep 2,Vapor-Lock
  • Mapei Ultrabond Eco 975, 980
  • Sikabond T-35 and T-55
  • Stauf Adhesives PUK-455 Wide Plank Adhesive, PUM-950 Power Mastic
  • Titebond 771, 811, 821
  • Wakol MS 230, MS 232, MS 260, MS 262, MS 290, MS 292, MS 245/246, PU 224, PU 385

Warranty letters from these companies are available upon request.

4 Installation Methods

  • Method 1
    Floating Floor

  • Method 2
    Nail planks directly

  • Method 3
    Nail and glue planks directly

  • Method 4
    Glue the planks directly (no fasteners)

Method 1: Floating Floor

This is a great option because the floorboards are  locked together at the joints of each board and not nailed or adhered to the subfloor. This approach allows the whole floor to move as a single unit if a dimensional change within the floor takes place.

We highly recommend installing acoustic padding between Warmboard and the planks. A good option is the Roberts’ AirGuard Premium 3-in-1 Underlayment with Microban (homedepot.com)

Method 2: Nail Directly

You do not need to install additional material between the Warmboard panel and the hardwood.

Installing hardwood perpendicular to the tubing pattern is the best method as it allows you to see the tubing and avoid damaging it. Tongue nail at a 45º angle using 2″ flooring nails at 6″ on center.

Occasionally, plank flooring may need to run the same direction as the tubing, and nailing the plank could cause tubing damage. Should this occur,
DO NOT nail – either glue with an approved adhesive or face nail the plank. While the planks can be successfully nailed down parallel to the tubing
pattern, this method may require extra labor. Strategic planning with the layout can avoid face nailing and gluing in many locations. 

Method 3: Nail and Glue Directly

Aside from the glue itself, you do not need to install additional material between the Warmboard panel and the hardwood.

Installing hardwood perpendicular to the tubing pattern is the best method as it allows you to see the tubing and avoid damaging it. Tongue nail at a
45º angle using 2″ flooring nails at 6″ on center.

Occasionally, plank flooring may run the same direction as the tubing, and nailing the plank could cause tubing damage. Should this occur, DO NOT
nail – the glue will successfully bond the plank to the Warmboard panel.

Method 4: Glue Directly

Aside from the glue itself, you do not need any additional material between the Warmboard panel and the hardwood.

  • When installing hardwood parallel to the tubing, rip the first plank at an appropriate width to create a nailing pattern which will avoid the
    tubing at all T&G locations.
  • ONLY use approved adhesives listed in the guide. Failure to use approved adhesives will void any product warranty.